Skype for Business and Match URI TLS Validation
Update: Further testing suggests that there is in fact no TLS validation performed against the Match URI, instead the TLS validation is performed against the Trusted Application Pool name. In my example below both the Trusted Application Pool name and Match URI are the same. However if your Trusted Application Pool name is different to the Match URI you should follow the steps below but supplement the Match URI for the Trusted Application Pool name. Apologies for the confusion.
Lync and Skype for Business have a concept of configuring static routes, this is not to be confused with the networking equivalent, but more a way or routing SIP queries (for a specific domain) to either a PBX, CSTN Gateway or a 3rd party conferencing solution.
In this article I’m going to cover off the use case whereby a 3rd party conferencing solution has been deployed and the ability to dial “Virtual Meeting Rooms” is required. This is different to newer Skype for Business interoperability solutions, for example “RealConnect” first introduced by Polycom and then an imitation “Dual Home” by Acano.
For those that are deploying VMRs with Skype for Business (or already have this deployed and are upgrading to Skype for Business) read on…
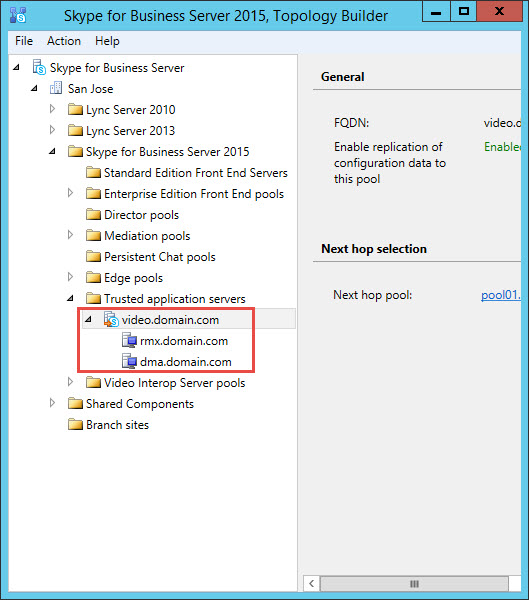
Typically when 3rd party MCUs or conferencing components like Polycom DMA or Cisco VCS are deployed they’re configured within a Trusted Application Pool. Within the example below we have a Trusted Application Pool configured, with two Trusted Applications. Whilst the Trusted Application Pool is defined as “video.domain.com”, this has no bearing upon the SIP domain which could be entirely different.
For simplicities sake in this scenario my SIP domain is also “domain.com” and my “Match URI” i.e. the domain being leverage to trigger my static route will be “video.domain.com”.
So what’s new, why write this article at all? Previously, dating as far back to OCS and until Lync Server 2013, a Match URI could be configured without any TLS validation. So to use the above example I could generate a certificate for my Trusted Application Server with the FQDN of the server i.e. dma.domain.com and I was good to go.
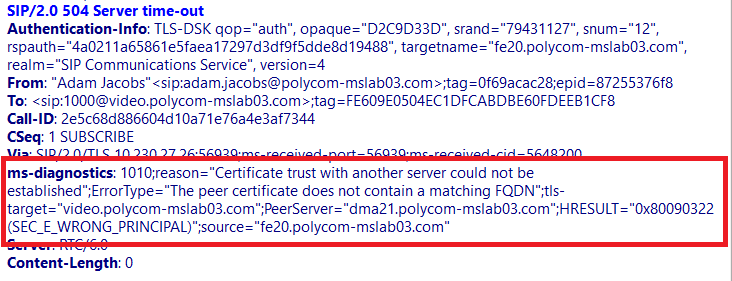
However with Skype for Business the TLS route is now validated, so in the case above I need to generate a SAN that encompasses both the FQDN for my Trusted Application Server and the Match URI. Failure to do this will generate a “certificate trust with another server could not be established”.
Let’s step through this process, first off let’s recap on the goal. My Trusted Application Server is dma.domain.com and my Match URI is video.domain.com, I’m using a Windows Enterprise Certificate Authority and I need to generate my certificate.
Usually I’d use IIS to generate my certificates in this scenario, but we’re creating a SAN and whilst this is possible leveraging the certificates MMC snap-in – I like simplicity 🙂
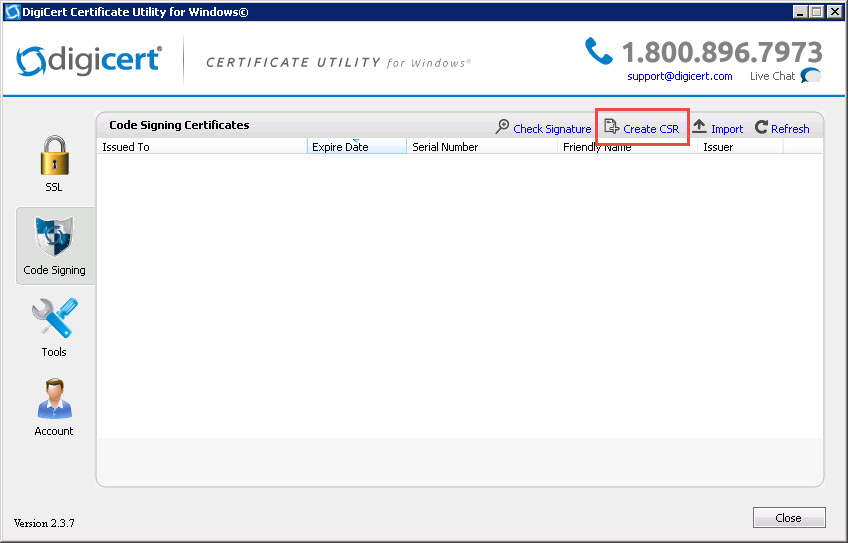
So I’m going to use a free/excellent utility from my friends at DigiCert, they’re certificate utility for Windows is an easy way to create certificate signing requests (CSRs) – it’s also got my out of some tricky spots and performs certificate repair and troubleshooting.
Step 1. Create my certificate request
Open the certificate utility executable from one of your Front Ends and select the “Create CSR” dialogue on the top right (see below)
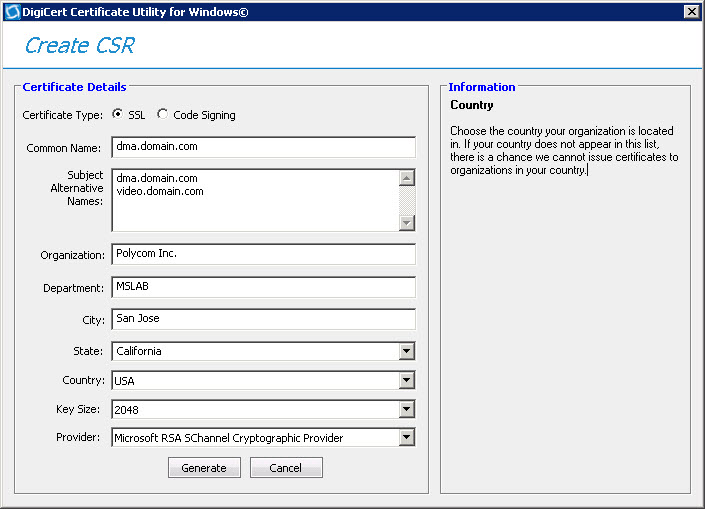
Step 2. Complete the certificate request
Ensure the certificate type is set to “SSL” and that your common name is duplicated and also specified within your subject alternative names.
Step 3. Generate and save to file

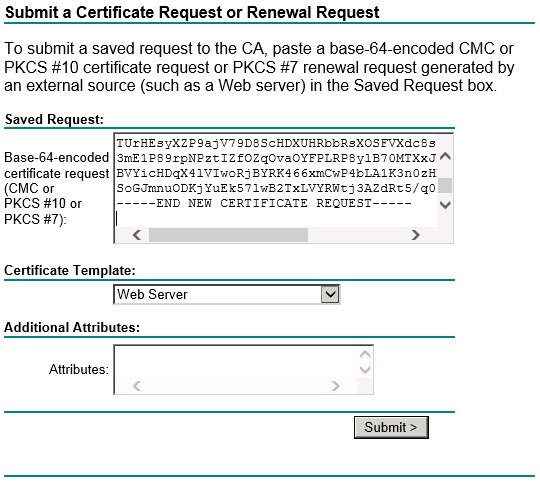
Step 4. Upload the certificate signing request file to your respective Windows CA, typically this can be performed via web enrollment by connecting to http://<CA.FQDN>/CertSrv. You will then be prompted to authenticate, once presented with this initial menu select -> Request a certificate -> Advanced certificate request.
Then paste as follows and ensure you change the certificate template to “Web Server” and click Submit.
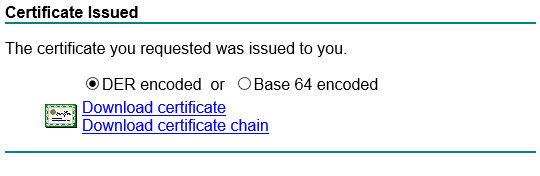
Step 5. Download the certificate
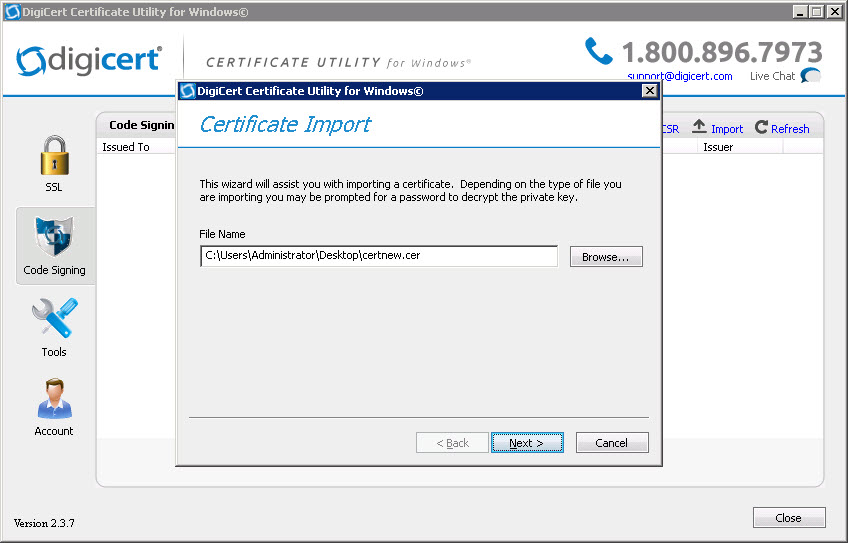
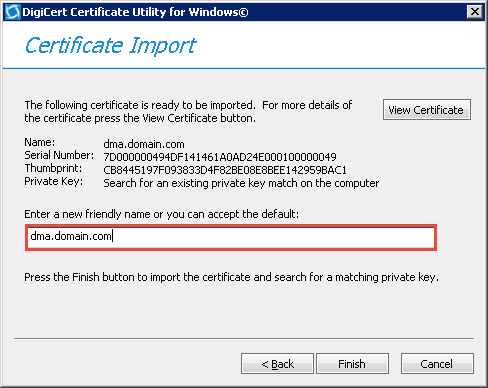
Step 6. Complete the request and import the certificate
Click import on the top right, point to the certificate file and assign a friendly name for easy identification.
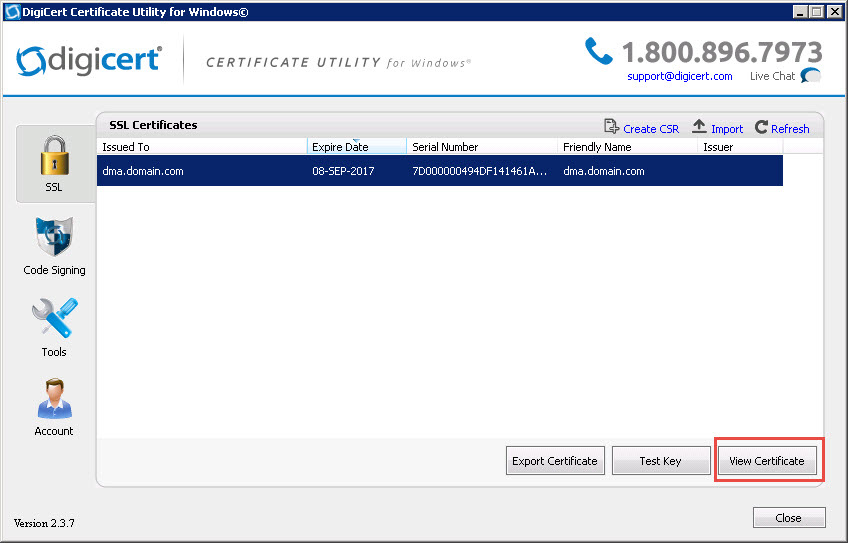
 Step 7. Validate your certificate
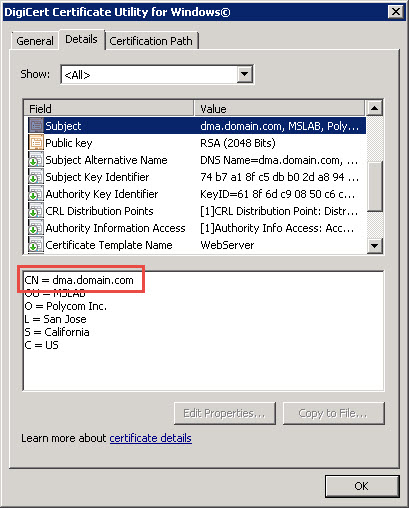
The certificate common name displays the Trusted Application Server FQDN (dma.domain.com) and the Subject Alternative Names contain both the Trusted Application Server FQDN (dma.domain.com) and the Match URI (video.domain.com).

Now proceed to upload the certificate to your 3rd party conferencing server and TLS errors are a thing of the past!