January 12th, 2012 | Tags: ,

Just quick heads-up, fellow MVP Tom Arbuthnot ran across an issue whereby Office Communications Server 2007 R2 or Lync Server 2010 Edge Servers URL filtering for IMs disrupts push notifications for both iOS and Windows Phone 7 clients. This is caused by:

Taken from Microsoft KB2664650

The Lync Server 2010 Mobility service sends SIP messages that contain active hyperlinks in their Message-Body header that define the XML namespace information for the push notification to the Lync Server Push Notification service.
Lync Server 2010 Front End Pool Using the URL Filter page in the IM and Presence group in Lync Server Control Panel to enable the Hyperlink prefix option Send warning message, will precede the active hyperlink with a user defined warning message in the SIP packet that contains the push notification message. The Lync Server Push Notification service will reject the modified push notification information and send an error response back to the Lync Server 2010 Mobility service.
Office Communications Server 2007 R2 Access Edge server Using the URL Filter tab of the Office Communications Server 2007 R2 Intelligent IM Filter dialog to:

  • Allow instant messages that contain hyperlinks, but convert the hyperlinks to plain text
  • Allow instant messages that contain hyperlinks. Enter a warning that you want to insert at the beginning of each containing hyperlinks

Will precede the active hyperlink with a user defined warning message and convert the active hyperlink to text by preceding it with an underscore or precede the active hyperlink with a user defined warning message in the SIP packet that contains the push notification message. The Lync Server Push Notification service will reject the modified push notification information and send an error response back to the Lync Server 2010 Mobility service.

For workarounds and more information refer to the Microsoft KB now live here

January 5th, 2012 | Tags: ,

For some time now I have been arguing debating that the benefits of Lync Edge Services (specifically client access without the need for a corporate VPN) out-weigh the security concerns around exposing NTLM-based authentication over the web – we already have a lock-out policy defined within group policy and some times you need to take a more risk-based approach right?

Unfortunately I was fighting a losing battle, I knew that the only way I could ever win this debate was if I somehow managed to replicate the incumbant two-factor VPN authentication that was already being deployed, in our case RSA – I know don’t get me started right?

My thoughts have always been swayed towards computer-based certificates, this would be the most seamless way of reproducing a two factor scenario (i.e something you know – in my case succesful Windows logon to an encrypted Laptop and something you own – the locally installed cert), much the same as the network access protection setup we had deployed a year earlier. In essence this consisted of:

(a) authentication with Active Directory + (b) a valid computer certificate = (c) an enabled network switch port

This would be great for Lync!

There was a realisation today that I must have been sleeping under a rock as I came across an interesting “tweet” from Rui Maximo, specifically regarding a Lync Security Filter he had developed.

This add-on (which is installed on your Edge Server) offers the following:

  • A soft lock-out policy you can enforce independently of your internal group policy settings (for value here you would need to set this below your internal lock-out threshold)
  • UPN to Netbios normalisation (i.e. where your domain is contoso and your SIP FQDN is contoso.com)

Last but not least…

  • The ability to disable NTLM v.2 authentication altogether, failing back to TLS-DSK-only authentication!

So what’s TLS-DSK?

Taken from the Lync Security Filter Documentation:

“Lync Server 2010 introduces support for an additional authentication protocol called TLS-DSK. This requires users to supply a client certificate for authentication. The Lync client requests certificates from Lync Server. This is an automatic process that happens the first time the user signs in to Lync Server from within the corporate network where the user is authenticated using Kerberos.

This client certificate is used for authentication with any subsequent log-in attempts. This is a self-signed certificate issued by Lync Server, not a Certificate Authority. If that same user tries to sign in to Lync from a different computer, he’s authenticated using Kerberos (if inside the corporate network) or using NTLM v2 (if outside the corporate network). The process of obtaining another client certificate starts all over.

TLS-DSK provides a level of security that’s very close to two-factor authentication. When combined with Windows BitLocker, the computer or laptop acts as the equivalent of a smartcard (something you have). The password that BitLocker requires to boot your computer is equivalent to the pin required to authorize the use of the smartcard (something you know).

There’s the remote possibility someone could steal the client certificate from the user’s computer, but you can mitigate this risk. Make sure corporate-issued computers are locked down to prevent users from downloading unauthorized applications.

You can force the Edge Server to negotiate the authentication protocol down from TLS-DSK to NTLM v2. In this case, the attacker can still target the user’s account, as discussed earlier. To prevent this scenario, the security filter provides an option to reject all NTLM v2 authentication requests, forcing TLS-DSK-only authentication. This doesn’t affect federated partner connections or PIC connections.”

In essence this Edge Server add-on completely mitigates the risk of allowing NTLM v.2 authentication over the web, burn turning it off. The only draw back here is that initial client logons will need to take place inside your corporate network (or directly between the Lync client and the Lync Front End Server).

Download: here

Nice one Rui! 🙂

Related Content:

For more on Lync Edge Server Security I’d recommend you read Rui’s guide on TechNet here

December 27th, 2011 | Tags: ,

If the answer is YES, then why not make your way to the January MUCUGL meet-up! 🙂

Justin, Tom and I have spent the festive season tinkering with the all-new Lync Mobility Service or MCX and look forward to sharing best practice/do’s and don’ts at our Mobility themed get together on January 19th @ Bow Bells House, London.

There are still spaces available, agenda and registration details can be found below:

Date: Jan 19th 2012 Title: The one about…Lync Mobility and Call Recording
Times Topics
18.00-18.20 – (high-level) Lync Mobility Architecture (AJ)
18.20-18.40 – (deep-dive) Lync Mobility Deployment (JM & TA)
18.40-19.10 – (Networking) N/A
19.10-19.40 – (AudioCodes Guest Speaker) Mobility and SmartTAP Recording for Lync
19.40-20.00 – (Chalk/Talk & Gen. Update) Latest resources and speaker specific updates. (All)

Registration: here

Location:

Bow Bells House 1 Bread Street EC4M 9BE London United Kingdom

December 9th, 2011 | Tags: , ,

So the waiting (as of writing) is almost over and the server-side bits for shiny new Lync Mobility Service (MCX) have been released!

The client-side bits are likely to be released next week and in the meantime there is nothing stopping you from prepping your Lync Servers. All clients have been released and can be downloaded via your Smartphone’s respective AppStore/Marketplace etc…

For those that are keen to get this up and running quickly, I have put together a short step-by-step guide, for official Microsoft documentation head here. I will however caveat one minor thing at this early stage, with the clients still unreleased this guide is still very much in beta! 😀 With all clients RTW’d this guide is officially v.1.0 🙂

Configuration of Lync Mobility Autodiscover Records

First up you’ll need to create the internal (lyncdiscoverinternal.<SIPFQDN>) and external (lyncdiscover.<SIPFQDN>) MCX discovery records, mine can be seen below:

As this is being configured within a test lab environment my internal discovery DNS is pointed at my Lync Standard Edition Server, for a larger deployment this is likely to be your Front End Pool or Director.

I have also configured the external discovery record, which can be verified using NSLOOKUP (see below). This is pointed toward the external listener address of my TMG reverse proxy.

Next we need to ensure that the November Lync Cumulative Update  (CU4) is installed – see more on this here, once this is complete we need to open up some internal MCX ports via the Lync management shell.

First the internal listening port: (my Lync Front End is lyncserver.jacobs.local, you will need to substitute this for your own front end/pool/director name)

Set-CsWebServer –Identity lyncserver.jacobs.local -McxSipPrimaryListeningPort 5086

Second the external listening port: (as stated in the prior step, my Lync Front End is lyncserver.jacobs.local, you will need to substitute this for your own front end/pool/director name)

Set-CsWebServer –Identity lyncserver.jacobs.local -McxSipExternalListeningPort 5087

Finally you will need to enable the topology, within the same shell type:

Enable-CsTopology –verbose

MCX Service Installation

Now we’re ready to install the MCX server components, this can be downloaded here. Before you can run the installation a few changes need to be made to IIS.

Within the Lync management shell run, ensure shell is run as admin if UAC is enabled (Windows Server 2008 R2):

Import-Module ServerManager
Add-WindowsFeature Web-Server, Web-Dyn-Compression

Or the following within the Windows command line, ensure command is run as admin if UAC is enabled (for Windows Server 2008):

ServerManagerCMD.exe –Install Web-Dyn-Compression

One complete you will be presented with the following

If you are running Window Server 2008 (IIS7.0) then you need to make a minor ASP.Net change (follow Microsoft procedure included below) – I’m running Windows Server 2008 R2 (IIS7.5) so I skipped this.

To change ASP.NET settings in IIS 7.0

1.   Log on to the server as a local administrator.2.   Use a text editor such as Notepad to open the applicationHost.config file, located at C:\Windows\System32\inetsrv\config\applicationHost.config.3.   Search for the following:<Add name=”CSExtMcxAppPool”4.   At the end of the line, before the ending angle bracket (>), type the following:CLRConfigFile=”C:\Program Files\Microsoft Lync Server 2010\Web Components\Mcx\Ext\Aspnet_mcx.config”5.   Search for the following:<Add name=”CSIntMcxAppPool”6.   At the end of the line, before the ending angle bracket (>), type the following:CLRConfigFile=”C:\Program Files\Microsoft Lync Server 2010\Web Components\Mcx\Int\Aspnet_mcx.config”

Now we’re ready to run the MCXStandalone.msi

First you’ll need to copy the McxStandalone.msi to C:\ProgramData\Microsoft\Lync Server\Deployment\cache\4.0.7577.0\setup, then execute C:\Program Files\Microsoft Lync Server
2010\Deployment\Bootstrapper.exe

During the installation you will be presented with “Installing MCXStandalone…” (see below)

Certificate Update

Now we need to update our internal SAN certificate, this needs to include the newly created lyncdiscoverinternal
record our internal certificates and first up we have to find the correct certificate identifier or thumbprint for this to be completed successfully. To display all certificates type the following within the Lync Management Shell:

Get-CsCertificate

This will return all certificates and their corresponding thumbprints, in my case all certificates are the same, so I can run the following command to update the cert for all uses.

Set-CsCertificate –Type Default,WebServicesInternal,WebServicesExternal –Thumbprint <Certificate Thumbprint>

During this process I was presented with a warning, upon further investigation neither Lync Discovery addresses were within my internal or external SAN certificates. To re-generate, I ran the following command within the Lync Management Shell

The easiest method for re-generating certificates is by re-running the Lync Deployment Wizard, going to Install or Update Lync Server System and executing Step 3 Request, Install or Assign Certificates

For more information on this the Microsoft MCX deployment guide details alternate certificate scenarios i.e. where you have a unique cert per usage type, refer to the section – Modifying Certificates for Mobility


Forefront TMG Configuration for Lync Mobility

There are two approaches here, one uses SSL for setup the other does not. The main reason for allowing a re-direction from port 80 (http) to 443 (https) is to avoid the need of replacing your existing SAN.

The recommended approach is to only permit the Lync mobility client to communicate on port 443, so I replaced the certificate within my existing Lync web listener within Forefront TMG – so we’re going to run you through this setup below (you could also add the additional public name “lyncdiscover.SIPFQDN” to an existing Lync website rule, but I’m going to run through this as an independent rule).

First we need to create the new web publishing rule (see below)

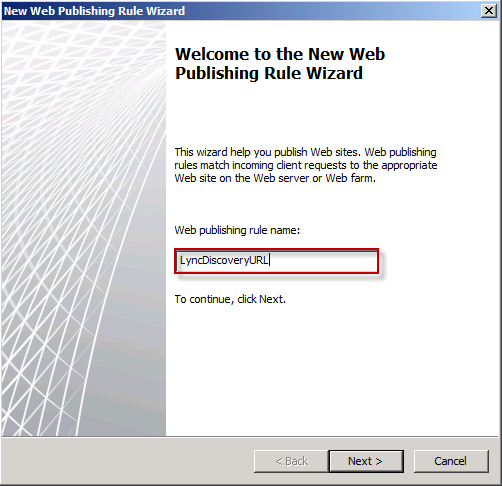
Give it a name (see below)
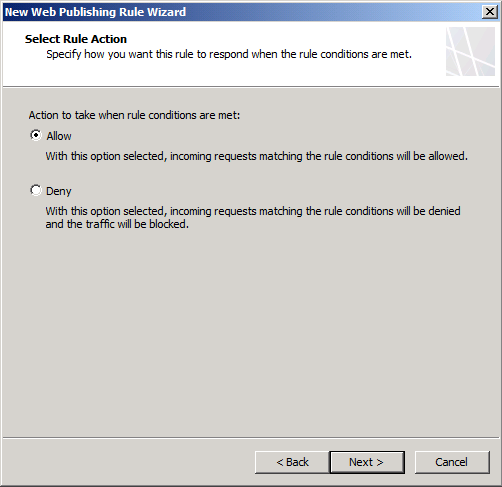
Select Allow (see below)
Select Publish to a single Web site or load balancer (see below)

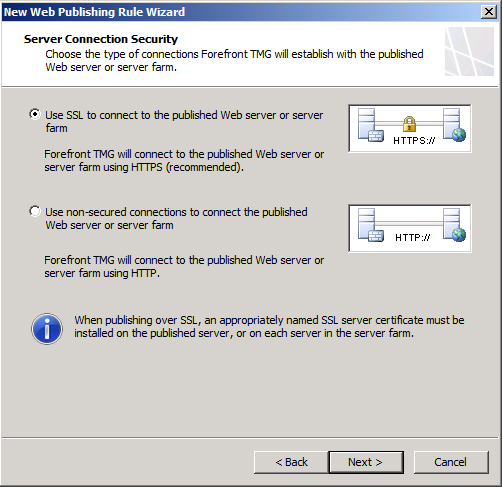
Select Use SSL to connect to the published web server or server farm (see below)
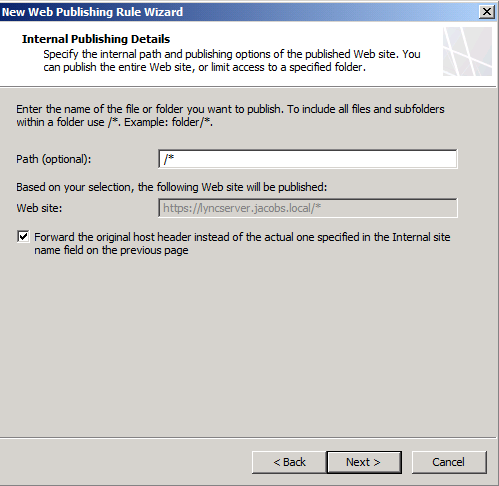
Specify your internal site name, this will be the name of your Front End Pool (see below)

Path should be “/*” and select the check box for Forwarding the original host header (see below)
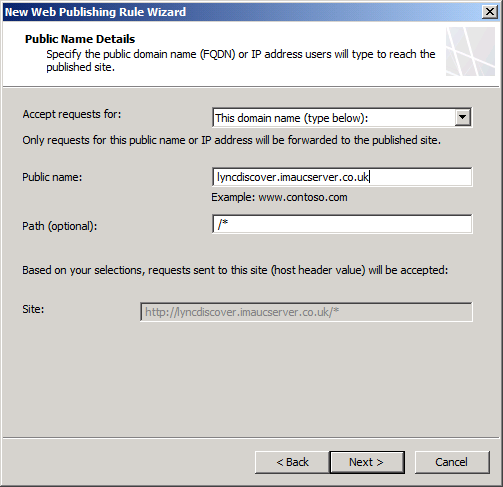
Add the public lyncdiscover address (see below)
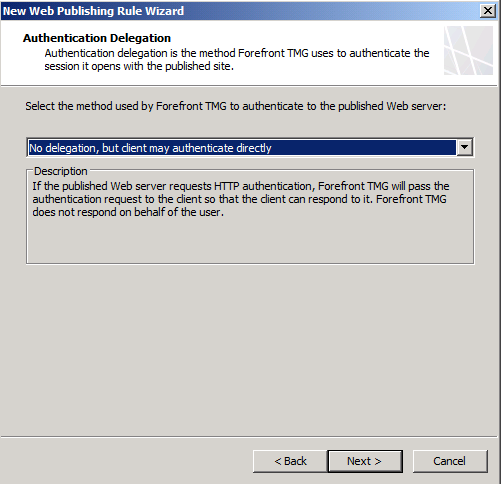
Select your existing Lync web listener, with the new SAN certificate that now includes the lyncdiscover address. Select No delegation, but client may authenticate directly (see below)
Finally allow requests from All Users and Finish

You will now need to go into your newly created web publishing rule and go to the to tab, in the section Proxy requests to published site, ensure that Requests appear to come from Forefront is checked for a single Front End server or Standard Edition server. Alternatively select Requests come from the original client if you have a Front End Pool (see below) This statement is incorrect, and unlike the single Front End server scenario was not tested directly and was taken directly from the official documentation – in both scenarios requests should appear to come from TMG.

Finally go to the Bridging tab and change the default ports from 80 -> 8080 and 443 -> 4443 (this is the external web site on your Lync Front End). Once complete ensure you apply the new rules.
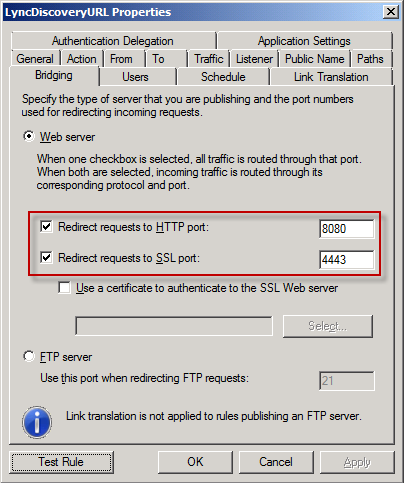
Your TMG rule is complete!

Push Notifications Configuration

Push notifications are handled by Microsoft Office 365 or Lync Online, so you need to have federation deployed and run the Set-CsPushNotificationConfiguration cmd-let

First let’s enable push notifications within the Lync Management Shell by running:

Set-CsPushNotificationConfiguration

Next we should enable federation with Office 365 (if not completed already), within the Lync Management Shell type: (this will add a new Hosted Provider)

New-CsHostingProvider –Identity "LyncOnline" –Enabled $True –ProxyFqdn "sipfed.online.lync.com" –VerificationLevel UseSourceVerification

Then add the Lync Push federated domain type:

New-CsAllowedDomain –Identity "push.lync.com"

That’s it!

November 19th, 2011 | Tags:

The latest batch of Lync cumulative updates are detailed below, server-side updates can be deployed via the Cumulative Update installer (recommended) or manually (download links below). Updates will as always make their way to Microsoft Update ETA late August.

Early indications from CU PowerShell help files (credit to Tom Arbuthnot and Ari Protheroe) suggest that CU4 paves the way for Lync mobility, with the addition of six shiny new cmd-lets:

  1. CsAutodiscoverConfiguration – Modifies an existing collection of Autodiscover configuration settings. The Autodiscover service provides a way for client applications such as Lync Web Access or Microsoft Lync Mobile to locate key resources such as a user’s home pool or the URL for joining a dial-in conference.
  2. New-CsWebLink – Creates a new web link that points to the Autodiscover service. The Autodiscover service provides a way for client applications such as Lync Web Access or Microsoft Lync Mobile to locate key resources such as a user’s home pool or the URL for joining a dial-in conference.
  3. Test-CsMcxPushNotification – Verifies that the push notification service is working. The push notification service (Apple Push Notification Service and Microsoft Lync Server 2010 Push Notification Service) provides a way to send notifications about event s such as new instant messages or new voice mail to mobile devices like iPhones and Windows Phones, even if the Microsoft Lync 2010 application on those devices is currently suspended or running in the background.
  4. CsMobilityPolicy – Modifies an existing mobility policy. Mobility policies determine whether o r not a user can use Microsoft Lync 2010 Mobile. These policies also manage a user’s ability to employ Call via Work, a feature that enables users to make and receive phone calls on their mobile phone by using their work phone number instead of their mobile phone number.
  5. CsMcxConfiguration – Modifies an existing collection of Microsoft Lync Server 2010 Mobility Service configuration settings. The Mobility Service enables users of mobile phones such as iPhones and Windows Phones to do such things as exchange instant messages and presence information; store and retrieve voice mail internally instead of with their wireless provider; and take advantage of Microsoft Lync Server 2010 capabilities such as Call via Work and dial-out conferencing.
  6. CsPushNotificationConfiguration – Modifies an existing collection of push notification configuration settings . The push notification service (Apple Push Notification Service and Micros oft Lync Server 2010 Push Notification Service) provides a way to send notifications about events such as new instant messages or new voice mail to mobile devices such as iPhones and Windows Phones, even if the Microsoft Lync 2010 application on those devices is currently suspended or running in the background.

Server-side updates

Client-side updates

Uncovering a last minute inability to join a Lync online meeting (or Live Meeting) can be incredibly frustrating, fumbling around for PSTN dial-in details and then switching from the “richer client” or Lync Attendee to the audio/video challenged Lync Web App a disappointment.

That is why I have spent that last couple of months (on and off) looking into an issue with both the Lync Attendee  and Live Meeting Clients when joining via an authenticated web proxy – in my case a Cisco IronPort, but the proxy vendor is immaterial – if it isn’t anonymous then you’ll hit a similar stumbling block.

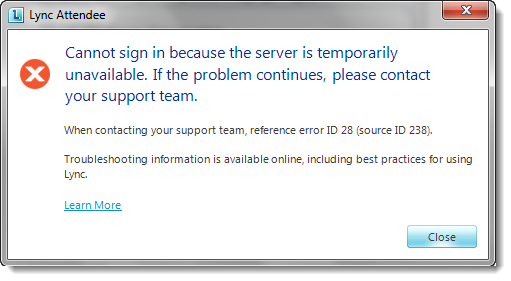
The first thing you’ll notice when you try to join is a failure (see below) and the inability to make it into the meeting lobby.

If we examine a network capture we’ll see why, pay particular reference to the “Using NTLM Authorization” (see below)

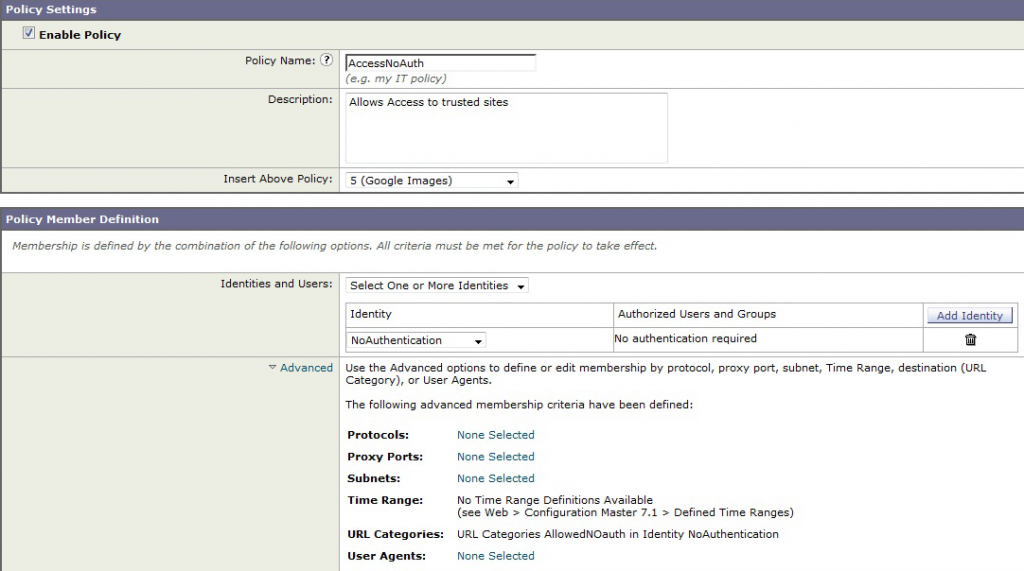
Whilst both clients support web proxies and obtain server settings via the Internet Explorer settings, they do not support any form of proxy authentication. Fear not there is a way around this, my workplace defined a group on our proxy for specific domains that we want to permit without content filtering or the need to enforce A/D authentication (IronPort examples below).

AccessNoAuth group definition:

The only drawback with this method, is that it requires you maintain a list of “white-listed” domains, for Microsoft we added livemeeting.com (Live Meeting) and sip.microsoft.com (Lync), the domains can easily be determined within a network trace.

I hope this helps!